Monday, May 30, 2016

Fooling Around With Foam


My art journaling class keeps me on my toes! The students are super talented and inspirational so I try to find projects that will be fun to make and add value to their books. Not an easy feat as they are truly creative folks and I must think outside my comfort zone to challenge them. But, they keep showing up each week, smiling and eager to see what's "on the menu" for that night! 

Foam sheets can be found at dollar stores and craft shops. Typically you'll find kids using them to make picture frame art, masks, pencil toppers, magnetic letters, and the like. 

I had my students create foam stamps to embellish their journals. With just a few supplies, they went crazy making awesome designs.


Here's how we did it:

Supplies 
  • Foam sheets
  • Scissors
  • Stamp pads and/or acrylic paint
  • Pencil, small paint brush, or chopstick
  • Wine corks and glue (optional)
  • Hole punch (optional)
  • Cookie cutters (optional)

How to make this
  • Using the pencil, paint brush handle, chopstick or other dull edged tool, draw a design in the foam sheet. 
  • Press the design into the foam so that it leaves a deep impression without going all the way through the foam. These indentations will not print when ink or paint is applied to the stamps.
  • TIP: use cookie cutters to press a design into the foam.
  • Cut along the outside of the foam designs so they are a more manageable size to print with.
  • Use a hole punch to create a cool pattern in the foam, if desired.
  • Add color to your new designs using a stamp pad or lightly brush paint on to the surface.
  • Stamp the design on to your journal pages!
  • TIP: glue a wine cork or a bit of thick cardboard to the back of your foam stamp to keep your fingers from getting ink or paint all over them, although painted fingers are a sign of a serious artist!
  • The foam can be rinsed easily, ready for a new color.
 

TIP: carve letters backwards in the foam...oops!

The possibilities are endless. Grab some foam sheets, a few supplies, and let your imagination go wild!


Wednesday, May 25, 2016

Dig Deep

Inspired by Mary Oliver's poem, "When I Am Among the Trees"


Dig Deep

It is said that a tree whose roots are deep
Never the wind will fell.

I need to know how deep is deep?
There are times I feel my soul is
Ready to snap, 
Ready to break.

Wouldn't it be simpler just to lay down?
Let pain and sorrow breeze right over me?

How much can I take?
How far must I bend?

Not a mighty oak but a weeping willow.
Deciduous not evergreen.

I will tell myself, "Keep growing, dig deep".

Monday, May 23, 2016

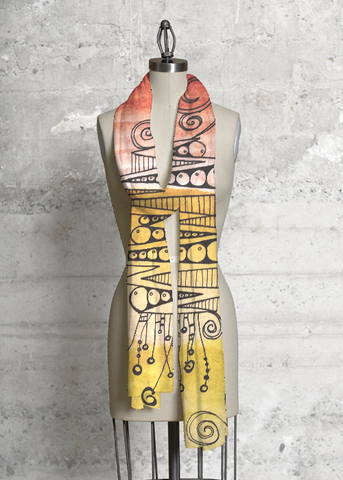
UPDATE 2017: Vida! My Custom-made Design Shop

As of January 2017, I have chosen to stop designing for Vida. Instead, I have created a much larger array of beautiful clothing, home decor, and tech products for Society6. Because I am regularly adding more products, visit my shop site often to see what's new!

I now design custom-made clothing for both women and men! The following products I had been offering through Vida but I later found the company disappointing to work with. Although I continue to design merchandise for Society6, below are examples of what my Vida pieces looked like and are samples of what my artwork looks like as wearables.


WILD THING  
ZIP LINE - YELLOW
Bold and Beautiful


PINK PLEASURES

Cityscape

Start looking great in one of my hand-designed works of heart!

WILD THING - LEAVES

ZIP LINE - YELLOW

See all of my current fashion collections on https://society6.com/kimlawsonart


Molding Paste Magic


I recently bought some molding paste after watching a couple of artist demonstrations. After playing with it on my own, I couldn't wait to spring it my art class students! We had a blast making bookmarkers and creating design-work in our journals. If you've used this medium before, stop laughing - sometimes I'm the last to catch on to cool products. If you've not used this stuff before, hold on to your hats - it's going to be a bumpy ride, literally!

Molding paste comes in a variety of "styles", from light to heavy to coarse. It creates a white or clay-tone finish that adds texture to artwork. It can be manuevered around while wet leaving peaks and shapes or it can be smoothed onto a surface for a bit of height and interest to a project. Once dried, it remains flexible without cracking and can be sanded, carved, and painted.

I bought the Golden brand of regular molding paste found at most craft stores and online. It has the consistancy of cake icing and is applied to a project with a palette knife, old credit card, or similar tool.

Here's what I did:


Materials

  • Molding paste
  • Cardstock or journal
  • Palette knife or old credit card
  • Acrylic paints
  • Stencils

How To Make This

  • Put a dollop of molding paste on a separate work surface, like a piece of paper or non-stick vinyl mat
 
  • Add a few drops of acrylic paint to the paste and stir it around to mix the two - instant colored paste!
  • Lay a stencil on the cardstock or journal page
  • Use the palette knife to smooth the paste over the top of the stencil. Using an old credit card to smooth the paste over the surface of the stencil is another handy trick

  • Carefully lift the stencil from the paper

  • Admire your work and move on to another page!

It takes about 15 minutes to dry depending on the thickness of the paste that you have applied.

TIP: while the paste is still wet, try making marks and impressions in it by using different tools like a fork, comb, or paper clip.
TIP: try smoothing a thicker layer of the paste on your page or card then gently pressing a rubber stamp onto the paste surface so that it will leave an interesting pattern.


You don't have to color it if you choose not to - it looks great in its original white form. In my journal, I applied the paste without color using large stencils, let them dry, then put the stencil back over the now slightly raised images, and colored them by spraying paint over one image and sponging rubber stamp ink over another. Very cool! 

You could try spraying ink or dabbing a rubber stamp pad onto your vinyl mat then swiping your dried white paste project through the ink for another colorizing affect.

Now I'm anxious to try it on canvas to create peaks and patterns. Stay tuned!

For more ideas on how to use the medium, here are some youtube links that may spark your creative powers...

marime's small art

one lucky day

nika in wonderland


Wednesday, May 18, 2016

I Always Have

My husband has had various kinds of cancers for many years. He is incredibly resilient and masterful in this battle. I admire him and adore him. Even still, cancer sucks. Together we are soldiering through this period in our lives, leaning on hope and each other.

This poem is inspired by Naomi Shihab Nye's poem, "Kindness".


Look no further,
Look no longer,
     I am with you---
     I always have.

Let me lift you,
Let me kiss you,
     I do love you---
     I always have.  

Little time,
Little pleasures,
     I so thank you---
     I always have.

Monday, May 16, 2016

Solar Glam In A Jar


Light up the night with this quick and easy project! With just a few supplies from a dollar store, and free energy from the sun, you can have little pots of glowing light to brighten up your garden and patio.

Supplies needed:
  • Mason jars of any size or clear glass bottles
  • Clear and colored glass marbles, stones, or strings of beads
  • Small solar lights (sold with ground stakes)


How to make these:
  • Pull the solar lights off of the stakes 
  • Fill the jars with the glass stones or beads
  • Press the solar lights into the jar of stones or beads so that the top of the lights are even with the top of the jar (you can choose to use the mason jar's screw-on ring or not)
  • Set the jars in the sun to let them soak up the light and get energized

Place these "mini lanterns" around your deck, patio, porch, or anywhere that you want a bit off nighttime glamour. You could bring the jars into the house at night so that you have soft glowing lights in a guest bathroom or bedroom as a pretty nightlight. These would make a beautiful tabletop decoration or garden feature at your next party!


Friday, May 13, 2016

Tooting My Own Horn


In an upcoming art show presented by the Concord Community of Artists, I will be one of 14 featured artists in a gallery show called "sight/unseen". The show runs from May 21 - 26, at the Artists Den located at 1913 Salvio Street in Concord, and will be open to the public.


Every few days leading up to the show, one of the artists has a short article featured on the CCA blog. Today is my day! Read about the other artists involved in this show by going to the CCA site....then come see the wonderful works that we have been putting our heART into!

Here's my article - "Meet the Artist"

This month we are featuring interviews with the artists who are in our upcoming art show - "sight/unseen" - at The Artist's Den in Concord, May 21-26, 2016.


This is Kim Lawson - what do you like most about living in Concord?
I have lived in Concord since 1992. Although it's the largest city in Contra Costa County, there's still a small town vibe here. I like its proximity to San Francisco and other great locales in the Bay Area. I feel lucky to be able to hop in the car for a quick road trip to the many wonderful places within California. 
Concord has been a great place to raise my family – we have lovely neighbors and have made many lifelong friends here. As an artist, there are numerous parks and places to sit and observe life - sketch, paint, photograph and ponder my favorite quote by Emily Dickinson...“I dwell in possibility.” 
I recently began teaching art journaling and general craft classes through the City of Concord’s Park and Recreation Department. I'm a member of the Concord Community of Artists and the Concord Art Association - two inspirational groups that I'm proud to be a part of. There are many talented artists living here - I would love the City of Concord to better promote and have more outlets for art and artists!


What medium(s) do you plan to use in your piece for this show?
Generally my work has focused on photography, acrylic and watercolor painting, as well as various forms of mixed media and crafts. For the sight/unseen show, I plan to step outside of my comfort zone and try something new. Yikes! What I envision in my mind does not always present itself in the final stage, but I like to push my boundaries and see what happens. Sometimes the result is better than I anticipated! I will be creating a 3D piece exemplifying my heritage and its influence and translation to my artwork.
 Are there exciting mediums or techniques you've learned about recently?
Last year I began art journaling – a place for me to experiment and practice ideas. Whoa! I fell in love with this creative outlet so much, that I now teach this art form to others. I carry a small journal and pens with me at all times because inspiration can happen at any time. I have a large journal that I play in every day. Sleeping is difficult sometimes when ideas keep knocking on my brain!
How long have you been creating art?
I like to think that I was born an artist. It's strange for me to consider myself as an artist because I’m no Picasso...I just make what I think is fun and whatever comes naturally to me. Technically speaking, I have been labeling myself as a self-taught artist for ten years. Additionally, I think I am misplaced royalty – probably 201st in line for the English crown. I have no formal art education, but being Queen won’t require that. But I have always drawn and sketched - it's a great way to stay focused during boring class lectures and business meetings! I also adore creative writing, papercrafts, repurposing things, and using weird collections of objects I find to enhance my projects. I find inspiration from master artists, fellow artists, and a wealth of museums, nature, and friends whose style I admire.
What advice would you give a new artist?
The best advice I have for budding artists is to give into the passion and desire to create, don't give in to the fear of failure. You can always paint over it! 
“What great thing would you attempt if you knew you could not fail?"
         - Robert H. Schuller


Wednesday, May 11, 2016

Life's Badges


Old age is for the lucky who make it there. Our outer appearance changes, we may forget where we put our keys, or mismatch our clothes. But the inner soul remains youthful and eager to proceed in life. 

My poem was inspired by Asian wooden figurines, one being an old man stooped over but looking to be walking on a path.


Life's Badges

My spine is curved forward
And I walk with a cane.

My beard is white
And my head bears no hair.

My teeth are false
And my eyes are a blur.

At times my hands tremble,
My mind draws a blank.

I don't sleep through the night,
But nap in the day.

I can remember being a child
As if it were yesterday,
But today I have trouble recalling your name.

These are the badges
I've earned with my age.

I'm old but not broken,
A little tattered and worn.

My time in this body
May be drawing to end,
But I cherish where it has taken me.

This is a gift.
What a wonderful life!

Monday, May 9, 2016

Let's Make Tissue Paper Flowers!


Making tissue paper flowers is simple and they add plenty of colorful impact perfect for Mother's Day, parties, or just a pretty vase. They can be made in various sizes from a boutonniere to extra large bouquets. 

One of my craft class students walked us through the making of these beautiful delights. Here's what Sandy showed us:

Materials

  • Sheets of standard sized tissue paper
  • Scissors
  • Floral wire
  • Floral tape

How to make this
  • For a medium sized flower, fold one tissue paper sheet in half

  • Fold the sheet again into thirds, bringing the outer edges towards the middle


  • Cut the folds so that you end up with 6 squares of tissue


  • Fan-fold the stack of tissues - starting at one edge of the paper, fold the sheets about 1 inch and crease, then flip the tissue stack over and fold the tissues 1 inch and crease, flip the stack over, and continue until you reach the other edge of the stack. The folds should be even in size.

  • Fold the center of the "fan" in half.

  • Cut the floral wire into a 10 inch length, or more or less depending on how tall you want your flower to stand.
  • Bend one end of the floral wire over about 2 inches.
  • Place the center fold of the fan into the fold of the wire and twist the wire around itself to close it.

  • Wind a strip of floral tape around the wire to hide it.

  • Use scissors to cut an oval shape at each end of the fan. Of course, I don't follow directions well, so I cut my tips into a pointed shape.
               
  • Push each side of the fan outwards into a cup-like shape.
  • Gently separate each sheet and pull them towards the center.

  • Fluff the sheets into a pleasing shape.

To make a large sized flower, follow the above steps but instead of folding the sheets in half and thirds, simply start the fan-fold process and go from there. 

Smaller flowers can be made just by making your tissue stack into smaller squares.

Try using multiple sheets of tissue for a fuller flower or using more than one color of tissue at a time for a variegated look.

How pretty and fun! 


Wednesday, May 4, 2016

Stuck On You


Life hurts sometimes. It may be a physical, emotional, or spiritual "boo-boo" but these can be healed and made new again. We are fantastic beings!

My poem was inspired by a box of band-aids.


Stuck On You

Like a band-aid,

I'm stuck on you.

I will do my best to protect you from further harm,

Keep you safe, keep you warm.

I will guard over you,

Stand by you,
And never let you fall.

With so many things that can get under your skin,

So many things that can go wrong,
I will stick with you, my love.
Nothing dare pull us apart.

Count on me, 

Trust in me,
I've got you covered.
________________________________________


Everyday, it seems like there's something to report, 
a new sympton, ache or problem. So many troubles visited on a single soul. I am deeply troubled and sorrowful for you. I wish that our lives were different today, that there were more of the yesterdays, that a simple band-aid would patch the pain. I hate to see you suffer. 

Come what may, together we can.

Tuesday, May 3, 2016

4th Annual Art & Wine Walk - May 7th

This Saturday will be a great day to enjoy food, music, and art! Find me in front of Agave restaurant where I will be showcasing my photography - just in time to get a Mother's Day gift! 
Grab your glass and come say hello!

A sample of what you'll see at my booth: