Showing posts with label jewelry. Show all posts

Thursday, August 24, 2017

Pop-up Art Show in September

  
An exciting event is coming your way September 17th - an art show featuring 12 local artists!

Mark your calendar to see various artworks for sale, including my photography on notecards and framed prints.


This is a one day show at a gallery in Pleasant Hill and is open from 11am - 5pm.

The location for this event:
                 I Heart Art Studio
                 15 Vivian Drive, Pleasant Hill


For more details, contact me via my blog or go to this link:

                                         September Art Show

Come support your local artists, buy something unique, and sample the free refreshments!


Monday, January 23, 2017

Bottled Art


At a local craft store, I found a package of itsy bitsy glass bottles and couldn't resist buying them. I went wild thinking of how these little vessels could be filled with all sorts of treasures. 

In our recent craft class we had fun filling the bottles with beads, pearls, layers of glitter, sand, and bits of shiny confetti. Once filled, we glued the lids on tight then tied pretty ribbons around the tops so that they could be slipped over our heads and worn as necklaces. 

We also wrapped wire around some of the lids creating loops to attach chain for a more classy necklace look. Here's how to wrap the wire:

Materials

  • Wire
  • Round nosed pliers
  • Jump rings
  • Chain
  • Clasp (optional)


About 2 inches from the end of the wire, wrap the wire around the pliers to create a loop. Wind the short end of the wire around the loop a few times and cut off any excess. Place the loop on one side of the bottle and wind the long end of the wire around the bottle top a couple of times. Use the pliers to make the second loop on the other side of the bottle. Wrap the bottle top one more time to secure the second loop ending with a final wrap around the that loop to anchor it. Cut off the excess wire. 


Add jump rings onto the loops. Measure the chain for the length at which you want the necklace to hang. For a longer necklace, say 20 inches or more, you can simply attach the chain ends to the jump rings and slip the necklace over your head to wear it. For shorter jewelry, measure two pieces of chain equal in length, attach one end of each of the chains to the jump rings and the other end of the chains to a clasp. Instant style!


More ideas for your bottle craft: 

  • wrap wire with a few beads around the entire bottle
  • add a bit of sand in the bottle and place a small love note inside
  • fill the bottle with colored water and a few pearls or sand and shells
  • add charms to dangle from the wire loops
  • make a mini terrarium by adding a little sand and tiny plastic plants
  • dap glue to the top and sides of the lid and roll it in glitter (once dried, dab a bit more glue to the glitter to seal it)
  • put a small label on the outside of the bottle - "fairy dust", "love potion", "wishes", etc
  • fill with feathers, shells, or sea glass
  • glue a silk flower to the lid top

Of course, you don't have to wear the bottles as jewelry. These tiny art pieces look pretty lined up in a window, as decoration in a natural plant terrarium, or nestled in book where you've cut out a hole in the pages. 

Have fun with this craft - don't keep your ideas "bottled up"!


Monday, July 25, 2016

Beat The Heat and Buy Something Cool!

Drew's San Francisco Blues print

It's hot here in California during the summer. I prefer this weather but, boy-oh-boy, it can get incredibly warm some days! These are fan your skirt and do-I-really-hafta-wear-a-bra kinda days. 

Today, while standing in front of the open refrigerator, pretending to look for a snack but really just enjoying the body freeze, I realized that I had the urge to buy something. Anything to make me feel good and happy. But I didn't want to brave the heat to go to the mall and rub elbows with other schweaty people. With my fan turned on high, I turned to my trusty computer for relief. Oh what a relief it is! I can shop at will in the comfort of my own home with next to nothing on (don't tell me you've never done that!). With that in mind, I thought you might like to do a little "comfort shopping" of your own. I happen to be having a summer sale of my Etsy merchandise and it's hot-hot-hot!

Scarves, handbags, jewelry, notecards, oh my!

After you've browsed there, check out my Society6 goodies. Here's a sampling of the sale on this sight: 
Wild Thang Leggings

Zen Lily Bedspread

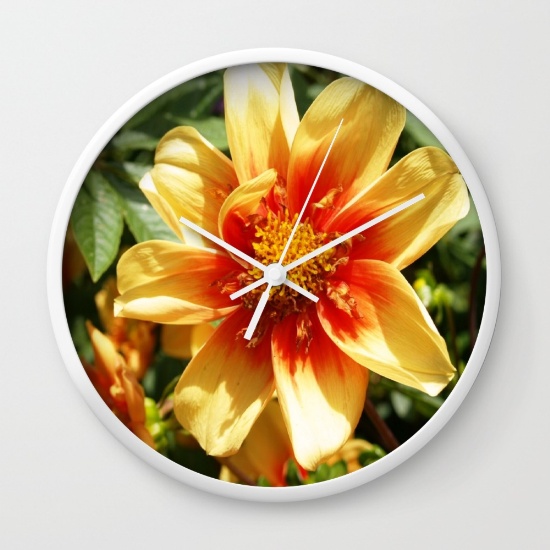
Sunny Delight Clock

Cherry Delight Phone Case

Rockin' Rooster Tote Bag

Heavenly Hydrangeas Shower Curtain

It's not too early to begin your holiday gift buying adventure. Make your list, check it twice, and get something for everyone whether they've been naughty or nice. And, treat yourself to a little something too. You'll feel the heat of the summer melt away. That's more time to put your feet up and enjoy a frosty beverage or two!

Monday, May 2, 2016

Simply Sensational Starfish, She Shrieked!


I just love jewelry and seashore stuff. Wanting to combine these two, and needing something new to wear this summer, I happened upon these adorable rhinestone starfish connectors at my local craft store. 

Ideas nearly always hit me when I least expect them, and usually when I'm at the craft store looking for something in particular. My eyes wander just past the particular and land on something else. Those clever craft stores see me coming and place all their goodies right where I'll see them, and sometimes in places I have to get down and dig through!

To make these oceanic beauties, here's what you will need:

Materials


  • 2 packages of a set of 3 starfish connectors
  • 12 silver-toned jump rings
  • 2 pair of silver-toned toggle clasps
  • 1 package of silver-toned chain for the necklace
  • 2 pairs of pliers
  • 2 margarita's (just checking to see if you're paying attention!)


How To Make This

Bracelet

  • Use the pliers to open the jump rings, twisting one half of the jump ring opening towards you and twisting the other half away from you. Don't pull them straight apart because this weakens the link.
  • Link one of the toggle clasps to a starfish connector with a jump ring and twist the ring closed.
  • Join that starfish connector to another connector using a jump ring and twist the ring closed.
  • Continue linking connectors until you have enough to go almost all the way around your wrist. Keep in mind that adding the final toggle clasp will add a bit more length. I used 5 starfish connectors plus the clasp which then measured about 7 1/2 inches in length. Plenty of room to allow the starfish to dance freely around my wrist!
  • Link the final toggle clasp to the other end of the bracelet using the last jump ring and close it.


Necklace

  • Determine how long you want your necklace to hang down. I have mine at about 22 inches.
  • Cut two even lengths of chain to your desired size (11 inches each piece, in my case).
  • TIP: You can choose to use a toggle clasp or not. If you make the necklace long enough to go over your head, you don't have to cut the chain into two lengths nor use the clasp. I chose to make a longer necklace and use the clasp.
  • Open 2 jump rings and join them to each side of the starfish connector.
  • Slip the ends of the chain onto the open jump rings and twist closed.
  • If adding a toggle clasp, open two more jump rings, connect them to the chain and toggles, and twist the rings closed.

Be prepared to be stopped on the street when wearing your new beachy-keen jewelry! It's dazzling, it's fun, it's so you!


Monday, April 18, 2016

Button, Button, Who's Got a Button!


I was thinking about a quick and easy project to teach to my craft class students this week and this idea came to mind. With just a few materials, you can go nuts coming up with ring-bling options! My class had a blast playing with this project. Once we dug through the mountain of buttons and orphaned earrings that I had collected to find the perfect treasures, we had a hard time stopping at the end of class!


Materials

  • Assortment of adjustable ring blanks (found at local craft stores)
  • Various sized buttons, post-style earrings, and/or faux gemstones
  • Super glue
  • Wire cutters
  • Metal file

How To Make These
Using the wire cutters, carefully remove any button shanks or earring findings. Be mindful of flying bits of plastic and/or metal when you make the cut!


  • File any rough edges after you've removed the shanks/findings so that the "jewels" have a smooth, flat surface.
  • Place the button on your work surface, right side down (this makes it easier to see exactly where you will place the ring blank when you are ready to glue)
  • Dab a drop of super glue onto the ring blank and swirl it around to cover the surface.
  • Place the ring blank onto the button back and hold it securely for several seconds for good adhesion.
  • Admire your new fashion creation!

A single fancy button is cute enough but try gluing two or three buttons for a stacked look or scattering several tiny buttons around a larger button base. 

The possibilities are endless!