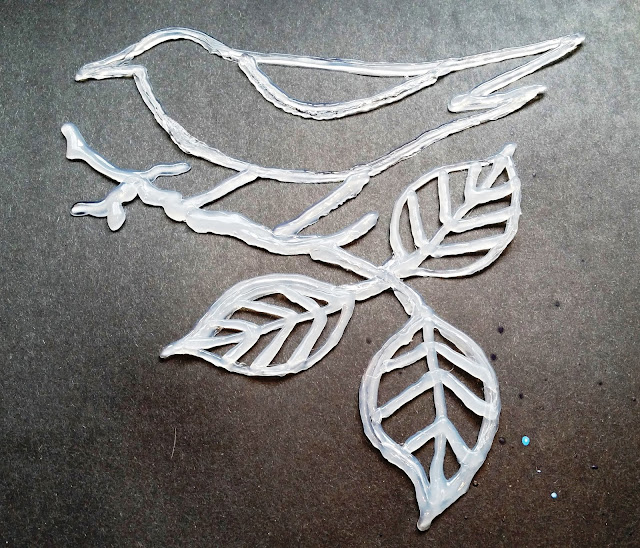
If you don't already have a glue gun, you're going to want to run out and get one after you read this! Not only are glue guns handy for tons of projects but making re-usable stencils may be your next favorite craft to try. These stencils are great for use in your journal, making greeting cards, bookmarks, and more. Warm up your glue gun and let's get going!
Here's a list of supplies that I used:
- Glue gun - either low heat or high heat type
- Glue gun sticks - lots of them because you're going to want to get crazy making more of these things
- Non-stick craft mat - a heat resistant teflon sheet (found at craft stores and online - excellent for all craft projects to keep your workspace protected and just wipes clean)
- OR a non-stick baking sheet or teflon pan would work fine (a piece of glass from a picture frame would work but you need to cover it with a light coat of vegetable spray first so that the glue doesn't stick to the glass and, of course, be careful of the frame's sharp edges)
- Picture or image outline to use as inspiration - optional
How to make the project:
- Cover your work surface with the non-stick sheet
- Plug in the glue gun and let it warm up for a few minutes
- If you choose to use an image as a guide, slip it under the sheet so that you can see the outline clearly (The image should be a black or dark image because it can be tough to see through the sheet otherwise. You might try outlining the image with a black marker first to make it easier to see throught the sheet)
- Once the glue gun is heated, slowly pull the trigger laying the glue down following the outline or try free-handing a design. I found that the heavier the line of glue that I layed down, the more sturdy the stencil became. If the stencil is made too thin, it may break and won't hold up to repeated use.
- Once you are happy with your design, let the glue cool and harden - it takes just a couple of minutes.
- Remove it from the teflon sheet and get busy making another design!
I made clouds, trees, and birds for starters. I liked repeating patterns like bubbles, hearts, squiggly lines, etc. Make sure that the shapes touch each other which keeps the design sturdy.

Try making large and small sized pieces. Large ones are great to fill a journal page or cover a greeting card and small ones work well for a "hint" of a pattern on your designs.

Once you've got some completed stencils, use them as you would any other stencil. I brushed acrylic paints over them and spray misted paint colors over the designs.
 |
| Bubbles and Hearts laid over each other and sprayed with paint |
To clean the stencils, carefully rinse them in the sink and let dry. I found that sometimes certain paint colors would stain the stencils. That's ok and won't harm the stencil when you're ready to use it again.
Happy stenciling!


No comments:
Post a Comment