Showing posts with label decorating. Show all posts

Sunday, November 26, 2017

Give Santa a Hand - Make Your Own Gifts!


I don't really know how old Santa Claus is but he looks like the same old jolly fella every year, never aging beyond the look of a centurion, despite the fact that he works 24/7 all year 'round. Managing a team of knee high employees and a number of antlered animals all working towards one special occasion - Christmas day!  Imagine being that guy, having to trust your pets without wings to fly you around while you deliver countless gifts to everyone around the world. Phew!

Let's save our Santa by choosing to make a few of our own gifts for family and friends! 

This Friday, December 1st, will be the first of my two holiday classes. As seen in the picture above, we will be making a charming keepsake - a Christmas tree made from buttons on top of a picture frame ready for display. The class begins at 6pm, costs $35 and includes all materials.

The second class will be on Saturday, December 2nd. In this class, we'll create wonderful wreaths like the red one above that you see peeking from under the button project or the white one below......or how about a gorgeous green wreath perfect to dress your door or tweak your tabletop! The class begins at 1pm, costs $35 and includes all materials.


Both classes will be held at Raquel Amaral's Gallery in 
Concord, CA - 1856 Colfax St., Suite 6.

Message me here or through my facebook page for registration information. 

Let's give Santa a little break this year. Join me for some fun, some friendship, and festive art!

Tuesday, November 21, 2017

Let's Make Something Together! Upcoming Holiday Craft Classes

The holidays are a perfect time to gather friends and family and get crafty! Handmade gifts are often the most cherished as nothing says love quite like 
"I made this just for you!".

I have a couple of upcoming classes that I will be teaching here in my hometown of Concord, California. Both are super fun to make with lovely results!

🎄🎄🎄🎄🎄🎄🎄🎄🎄🎄🎄🎄🎄🎄🎄🎄🎄🎄🎄🎄🎄🎄🎄🎄🎄🎄🎄

The first project will be on Friday, December 1st beginning at 6pm. We will create a charming Christmas tree made from buttons. We'll center the button tree on a picture frame for easy display - it'll be the center of attention during your holiday gatherings!


One of the cool things about this craft is that any holiday is open game for button art. In February, our class made beautiful framed button hearts. We loved the project so much that we're trying our hand at the Christmas tree design.


🎄🎄🎄🎄🎄🎄🎄🎄🎄🎄🎄🎄🎄🎄🎄🎄🎄🎄🎄🎄🎄🎄🎄🎄🎄🎄🎄

The second project will be on Saturday, December 2nd, beginning at 1pm. In this class, we'll make a gorgeous wreath using tulle fabric and embellishments. So many options here to make a unique door decor!

White tulle wreath - with removable poinsettia's - perfect for using at other occasions
Here are further class details:

WHERE:  Raquel Amaral Art Gallery – 1856 Colfax Street, 
                  Suite 6, Concord

COST:      $35 and includes all materials

PAYMENT DETAILS: advance payment is required to hold your place. Email me at kimlawson2000@gmail.com and I will send you a Paypal invoice.
                  
Let's make something together, make new friends, and start the holiday season with something beautiful made just by you!

See more of my artwork by clicking on the Etsy and Society6 tabs here. 


Friday, January 13, 2017

Holiday Art - Never Too Late Or Too Early To Create These Projects!


While the holiday season has just ended, I thought it would be nice to showcase the fall and winter projects that my clever art students created. Not only are they the wonderful results of artistic minds but serve as inspiration for projects you might like to try. 

The fall projects included wreath making using the rich, warm colors of seasonal leaves, acorns, gourds, and found objects. A pretty welcome to guests coming to the front door or when used as a tabletop centerpiece.


Lin's wreath in-progress

 We had big fun making Halloween dioramas out of hollow foam pumpkins!

Alicia and Nicole's fright-tastic pumpkins

Carol's witchy creation

Sandy's pretty pumpkin

Kim's sugar skull diorama and kitty card

We painted wood slices for home decor or table top display.

Gold lettered quote

Stenciled molding paste design

Nicole's handpainted fantasy


Stacked trays made from stovetop burner covers and wine glasses or candlesticks make lovely towers for serving holiday sweets and treats.


Rosa's intricate trays

9-year-old Sophia's showstopper
Nicole's handpainted designwork 


The Christmas season gave us lots of opportunities to make ornaments, wreaths, and gift items.

Mini winter hat ornaments made from yarn knotted over toilet paper rolls


Who knew empty wine bottles could look so good! We used ropes of glittery pipe cleaners and hot glued them around the bottles for a festive design.

Nicole, Sophia, and Rosa show their talents


A quick and easy ornament idea is to fill clear acrylic bulbs with anything!

Bulbs filled with snowflakes and greenery

Red Dollar Store bulbs on a wire wreath

Silver and gold bulbs and garland from the Dollar Store 

We made reversible garlands to hang during the fall and winter holidays.

Burlap leaves and tiny bags decorated with glitter paint and felt leaves and acorns

Turn the fall garland over to show the Christmas decor - the tiny bags perfect for hiding small treats in

A clear plastic bulb filled with foam dots and and a child's sock fashioned as a hat


Oh what fun we had! It's never too early to begin a winter project and present someone special with a handmade gift. Christmas is only 49 weeks away!


Monday, November 14, 2016

Falling For Wreaths


The seasons are changing - Mother Nature is beginning to show herself by way of fiery colors and crisp cold nights.

It's time to sit by a warm fire and get that glue gun out! Even if you don't have a fireplace to sit near, you can still create a fabulous fall wreath to adorn your front door, use as a table centerpiece, or present it to the host of a Thanksgiving party!

To make this wreath, here's what you will need:


Materials


  • Wreath frame - I used a 12 inch grapevine wreath but wreath frames made of  wire, straw, or styrofoam are fine to use, any size you like.
  • Various fall-colored faux leaves, flowers, berries, small foam pumpkin, gourds, etc.
  • Glue gun and glue sticks
  • Optional: decorative ribbon for hanging the wreath
  • Tip: I found many of these items at the local dollar store - nice quality and assortment without breaking the bank!

Let's Make This

Adding the details


  • If desired, glue or wrap a pretty ribbon to the back of the wreath for easy hanging
  • Use the glue gun to adhere leaves and flowers around the front and sides of the wreath frame so that the frame is hidden.
Lin's wreath in progress
  • Add the decorative pumpkins, gourds, and other items in several places around the wreath
  • Tip: Lin used a wire wreath and wrapped orange mesh ribbon around the frame before gluing on flowers (both from a dollar store!). This gave it a nice colored background to start with and ease in gluing items to a solid backing.


There you have it! A lovely showpiece that will last for years and you can say "I made it myself!"

Monday, October 31, 2016

Journaling Pages - Using Paint, Pictures, and Credit Cards As Tools

My in-home classes are taking off with a bang and a glue gun! We're having so much fun making new artwork while gabbing and giggling, with maybe a glass of wine to promote extra creative powers!

Our first journaling class projects included making background pages with paints and credit cards. We also got hooked on making stickers using packing tape and magazines. Sooo much fun making those!

To get started making some backgrounds for your journal, follow these steps:

MATERIALS
  • Blank journal or other book
  • Acrylic paints
  • Old credit/gift card
  • Baby wipes or paper towels

HOW TO MAKE THIS
Super simple but it looks really cool!
  • Squirt a few drops of acrylic paint anywhere on the page
  • Drag the credit card across the paint and the book pages - straight line, zig-zag, curvy - have fun with the process.


  • Between colors, wipe any excess paint off of the card with a paper towel or baby wipe. Be sure to smoosh all the paint off the card on to your pages before wiping (never waste good paint, right?)
Donna adding colors to her pages
Alicia's making waves of blue

  • Drop another color on to the page and repeat the swiping over the pages. Do this with as many colors as you like, even criss-crossing colors over each other. In the image below, I first wrote words on the pages using a white crayon, placed post-it notes at various places, then swiped the paint over the pages. It took a minute for the paint to dry before I removed the post-its and used a baby wipe to remove the paint from the crayon areas. A pretty place to doodle and add images, like the packing tape stickers!

Now, you're done! You've got a great start on building some great journal pages.
___________________________________________________________________

Try making this next project and see if you don't get hooked on the magic!

Donna's blue floral dress sticker
To make the packing tape stickers:

MATERIALS
  • Magazines or books with pictures (images printed on thinner paper seemed to work best)
  • Bowl of water
  • Packing tape
  • Old credit/gift card
LET'S DO THIS
  • Find an image that you like in a magazine. Bold colors with lots of contrast look wonderful!
  • Carefully lay a strip of packing tape over the image, just past the edges of the picture. If the image is too large for one strip of tape, overlap a second strip slightly over the edge of the first strip.
  • Use the credit card to smooth out any air bubbles from the tape.
  • Place the taped image into the bowl of water and let it sit for a minute.
  • Gently rub the paper image from the back of the packing tape. The paper rolls off but the image remains on the tape. Magic!
  • Use glue to adhere these images on to your journal pages and envelopes. How about window clings!

Get busy and get creative!


Monday, October 24, 2016

Boo-tiful Crafts to Make


With Halloween just a week away, pumpkin carving projects came to my mind as a perfect treat to make for celebrating this holiday. 

I challenged my art students to come up with their own twist on creating jack-o-lanterns. As usual, they met the summons with gusto and, before long, we had a table filled with beautiful achievements!

Alicia was very excited about this project - or perhaps it was the wine and tangerine margarita's working?!

Here's how we made decorative vases

SUPPLIES
  • Hollow, styrofoam pumpkin (I found a 6 inch size at a dollar store)
  • Serrated knife
  • Various fall-colored artificial flowers and Halloween related items
  • Hot glue gun (optional)
HOW TO MAKE IT
  • Carefully make a circle cut at the top of the pumpkin using the knife, at least big enough to put your hand inside (shown at the right is the cut-out I made on the side of a pumpkin to prepare it for a diorama)
Option 1:
  • Place artificial floral stems inside the pumpkin allowing the blooms and greenery to pop from the top 
Rosa's Fall Floral Vase - with a touch of bones

Option 2:
  • Hot glue objects to the pumpkin so that they're peeking out of the top (I rummaged through my stash of Halloween decorations and put them out for the group to find clever ways to reuse them - styrofoam skulls and bones, plastic witches and spiders, leaves, etc.) 

    Carol's Witchy Vase
Option 3:
  • Place a glass cup inside the pumpkin, tall enough to reach the rim, and fill with potting soil and a succulent or other live plant.
The floral vases make pretty tabletop displays or hostess gifts, perfect for this holiday and through the Thanksgiving season.


To make a diorama:

SUPPLIES
  • Hollow, styrofoam pumpkin, any size
  • Serrated knife
  • Various fall-colored artificial flowers, moss, vegetable netting, and Halloween related items
  • Hot glue gun
  • Battery operated tea lights (optional)
HOW TO MAKE IT
  • Carefully make an oval cut at the side of the pumpkin using the knife
  • Fill the pumpkin with whatever suits your fancy! 
  • We hot glued moss, florals, and spooky objects inside and outside the pumpkins. I cut up a bit of netting from a vegetable bag and hot glued that to the inside back of a pumpkin and then glued a spider to the "web". In another pumpkin, I placed a plastic skull from a dollar store that I painted in a sugar skull fashion on top of a bed of moss. I put a battery operated tea light on either side of the skull so that they would flicker inside the pumpkin and show off the skull. As you can see from the picture at the top of this page, it turned out quite booo-tiful!
Sandy's Floral Diorama with Skeleton Pair
Carol's Fright Night Scene


Alicia and Nicole's Spooky Creations


Don't be afraid to create your own frighteningly beautiful art!


Friday, October 14, 2016

Pour Your Art Out - New Classes Are About To Begin!

Start the fall and winter seasons off right by taking art classes taught by your favorite teacher - me!

Beginning Thursday, October 20th and Saturday, October 22nd, learn exciting new weekly projects in "Art Journaling" and "Exploring Crafts". (Thursday projects are repeated on Saturdays). The cost is $20 for each 2 hour class and will include some supplies.

For the first week's projects, here's the plan:

ART JOURNALING
(Thursdays, 5:30pm - 7:30pm; Saturdays, 9:00am - 11:00am)

We will be creating background images and colors using paints, credit cards, string, crayons, various papers, saran wrap, and packing tape transfers.
  • Bring your art journal (I use the 8 1/2" x 11" Ranger Dylusions Creative Journal, but bring whatever is your favorite)

EXPLORING CRAFTS

(Thursdays, 7:30pm - 9:30pm; Saturdays, 11:30am - 1:30pm)

With Halloween just around the corner, we will be making pumpkin vases and dioramas. Trust me - these are super cute!
  • Bring 2-3 carvable/hollow pumpkins, any size. (I found 6" pumpkins at the Dollar Store and larger ones at Joann's)

Future Art Journaling classes will include zentangles, magazine collage fantasies, adding color over black and white photos, using puzzle pieces, 3D image making, print making, and more.

In Exploring Crafts we'll make seasonal burlap banners, fall wreaths, music sheet angel wings, fabric painting, popsicle stick bracelets, mason jar art, canvas painting...let me stop right there!

All classes will be held in Concord - message me for details.
I'm looking forward to seeing you and getting our art on!

Monday, July 25, 2016

Beat The Heat and Buy Something Cool!

Drew's San Francisco Blues print

It's hot here in California during the summer. I prefer this weather but, boy-oh-boy, it can get incredibly warm some days! These are fan your skirt and do-I-really-hafta-wear-a-bra kinda days. 

Today, while standing in front of the open refrigerator, pretending to look for a snack but really just enjoying the body freeze, I realized that I had the urge to buy something. Anything to make me feel good and happy. But I didn't want to brave the heat to go to the mall and rub elbows with other schweaty people. With my fan turned on high, I turned to my trusty computer for relief. Oh what a relief it is! I can shop at will in the comfort of my own home with next to nothing on (don't tell me you've never done that!). With that in mind, I thought you might like to do a little "comfort shopping" of your own. I happen to be having a summer sale of my Etsy merchandise and it's hot-hot-hot!

Scarves, handbags, jewelry, notecards, oh my!

After you've browsed there, check out my Society6 goodies. Here's a sampling of the sale on this sight: 
Wild Thang Leggings

Zen Lily Bedspread

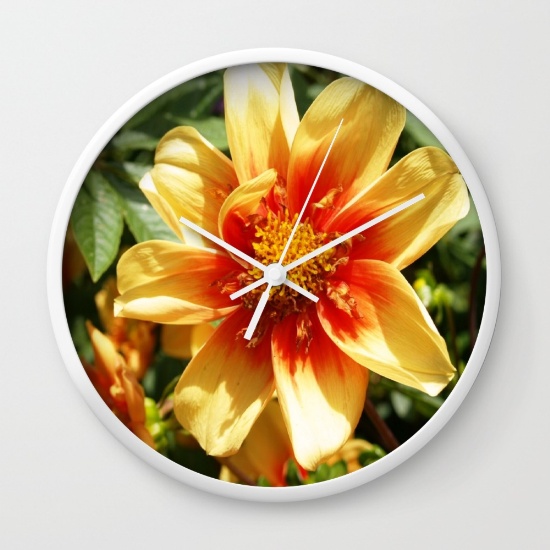
Sunny Delight Clock

Cherry Delight Phone Case

Rockin' Rooster Tote Bag

Heavenly Hydrangeas Shower Curtain

It's not too early to begin your holiday gift buying adventure. Make your list, check it twice, and get something for everyone whether they've been naughty or nice. And, treat yourself to a little something too. You'll feel the heat of the summer melt away. That's more time to put your feet up and enjoy a frosty beverage or two!