Showing posts with label journal. Show all posts

Tuesday, January 3, 2017

2017: A Creative Year Ahead with New Classes and Inspiration


According to the Chinese calendar, 2017 is the Year of the Rooster - the rooster being the sign of dawn and awakening, when triumph and success can be achieved through hard work and patience.

With the dawn of a new year comes new and wonder filled possibilities. I will be continuing to teach my art class series, introducing exciting projects for both art journalists and crafters.

Beginning Thursday, January 5th and Saturday, January 7th, learn weekly projects in "Art Journaling" and "Exploring Crafts". (Thursday projects are repeated on Saturdays). We'll create new projects each week, none that we've done in previous sessions!

The cost is $20 for each 2 hour class and may include some supplies.

Art Journaling classes on Thursdays run from 5:30pm - 7:30pm with projects repeated on Saturdays from 9:30am - 11:30am.

Exploring Crafts classes on Thursdays go from 7:30pm - 9:30pm with projects repeated on Saturdays from 11:30am - 1:30pm.

Future Art Journaling classes will include dream board designing, journal cover decorating, zentangles, magazine collage fantasies, adding color over black and white photos, using puzzle pieces, 3D image making, print making, and more.

Donna's Doodle

In Exploring Crafts we'll do 
canvas painting, 
jewelry making, fun with mason jars, fabric painting, mini book designing, garden art, light switch fabric covers, and other great projects!

Decorative bird house
All classes will be held at my in-home Concord studio - message me for location details and to be added to my weekly "create it" email list.

I'm looking forward to seeing you and getting our art on!

Monday, November 21, 2016

Line Dancing


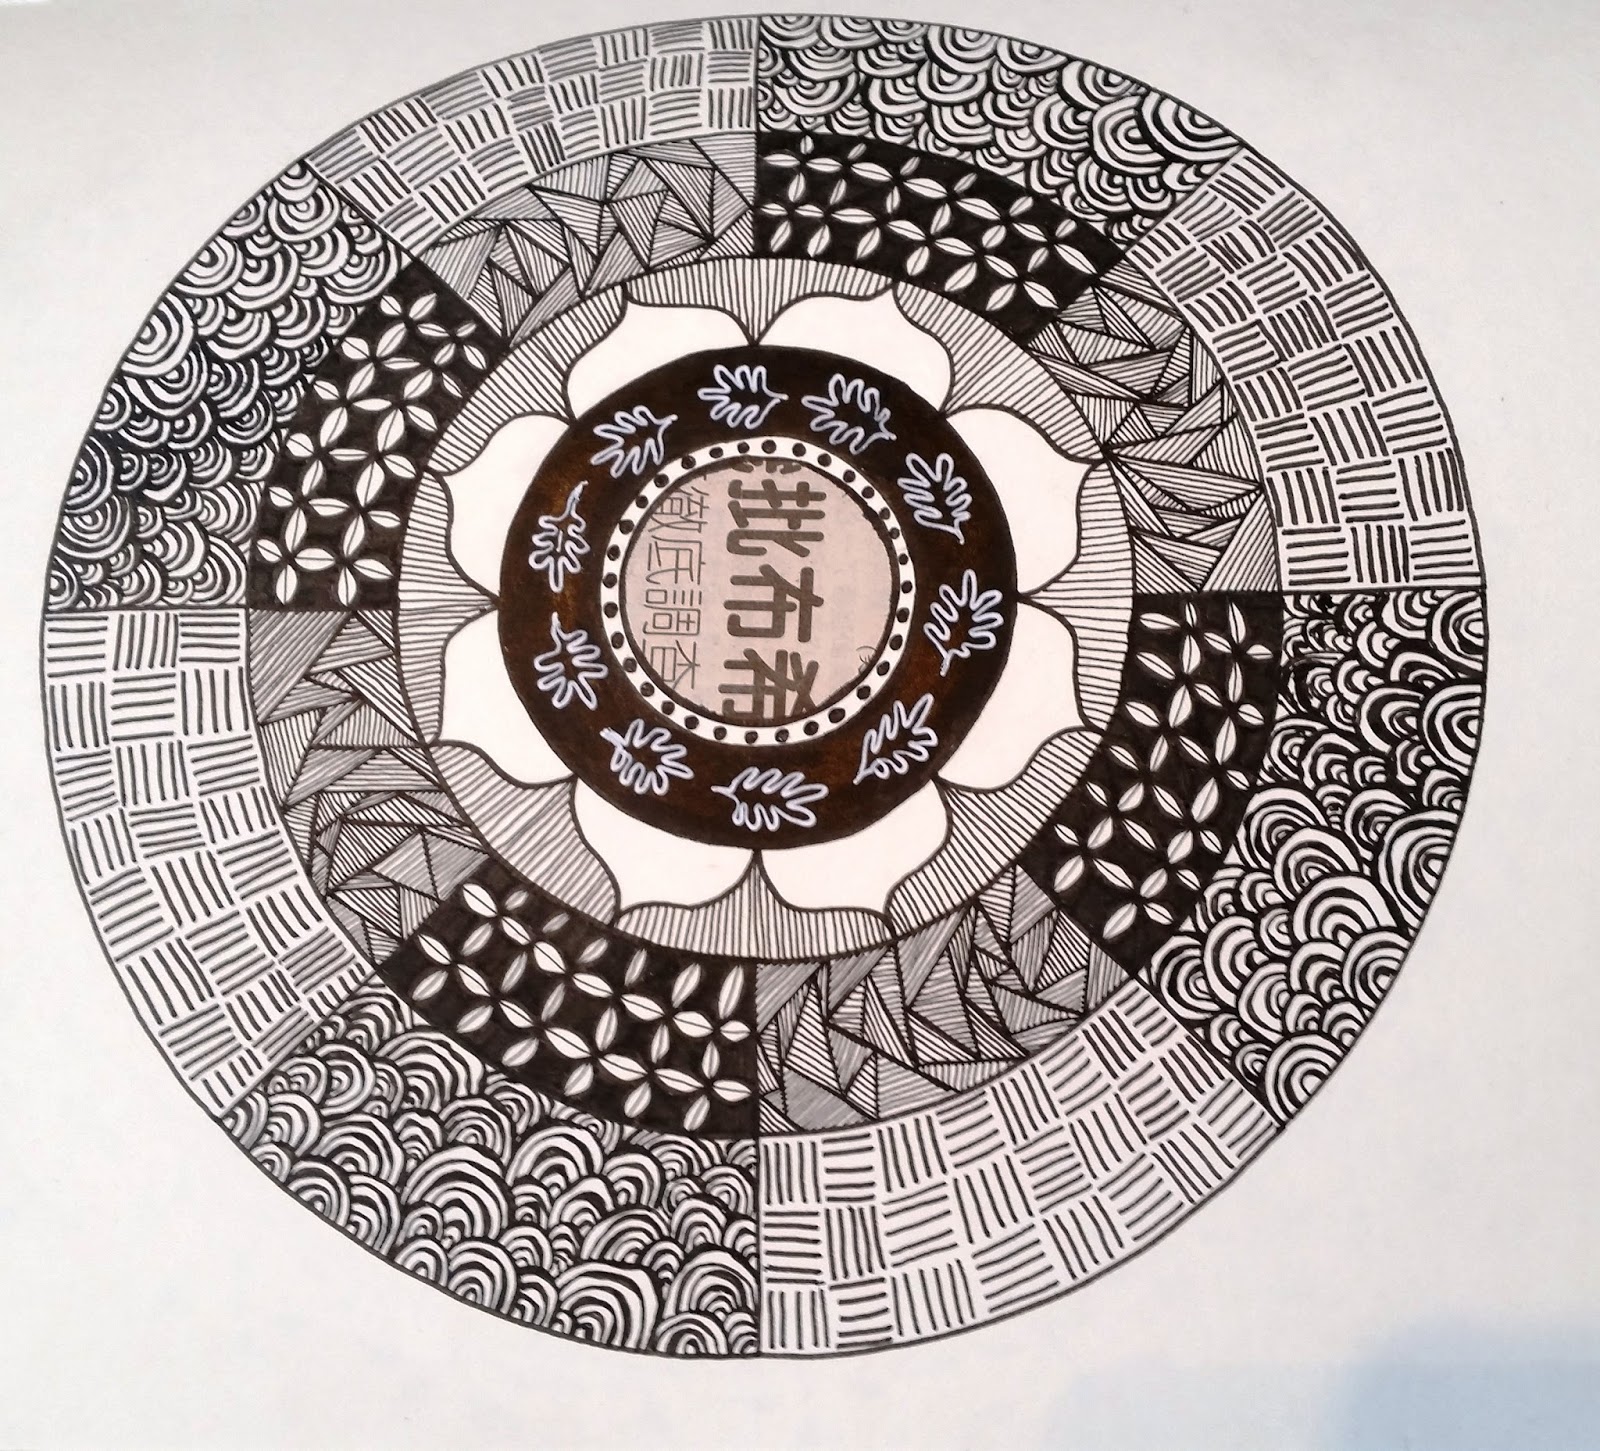
Staff meetings, waiting rooms, airplane rides, talking on the phone - all perfect opportunities to doodle and play with line drawing. I love pressing my brain to create fun patterns, using my journal as my playbook. 

Some may call this Zentangle but I don't conform to any particular rules, just allowing my mind to envision pattens and willing my hand to follow through. 


One of my students stared at the blank pages of her journal saying that she didn't know where to start. I told her not to think about it too hard - just put the pen to paper and begin drawing random shapes. Once you get going with nothing particular in mind, magic happens! These shapes are then sectioned out, filled in with staight lines, circles, zig-zags, and other patterns resulting in wonderful designwork.

Alicia's doodle page

I've created several pages of patterns that I reference when doing new work. It's addictive!


Pinterest or searching the internet for doodle patterns are excellent places to get ideas from. 

Having several sizes of pen tips is a plus. This allows you to make very detailed patterns and designs. I like using Pigma micron pens because of the variety of pen tips, they are permanent ink (which is great if you want to watercolor over your images), and they last a long time. Look for these qualities in the pens you use.


Here are more of my students' artwork - 

Donna goes wild!

Donna's creation

Sandra's lines

Marla's mandala


Open your journal, let loose your mind, and see what exciting art comes flowing out!

Monday, October 31, 2016

Journaling Pages - Using Paint, Pictures, and Credit Cards As Tools

My in-home classes are taking off with a bang and a glue gun! We're having so much fun making new artwork while gabbing and giggling, with maybe a glass of wine to promote extra creative powers!

Our first journaling class projects included making background pages with paints and credit cards. We also got hooked on making stickers using packing tape and magazines. Sooo much fun making those!

To get started making some backgrounds for your journal, follow these steps:

MATERIALS
  • Blank journal or other book
  • Acrylic paints
  • Old credit/gift card
  • Baby wipes or paper towels

HOW TO MAKE THIS
Super simple but it looks really cool!
  • Squirt a few drops of acrylic paint anywhere on the page
  • Drag the credit card across the paint and the book pages - straight line, zig-zag, curvy - have fun with the process.


  • Between colors, wipe any excess paint off of the card with a paper towel or baby wipe. Be sure to smoosh all the paint off the card on to your pages before wiping (never waste good paint, right?)
Donna adding colors to her pages
Alicia's making waves of blue

  • Drop another color on to the page and repeat the swiping over the pages. Do this with as many colors as you like, even criss-crossing colors over each other. In the image below, I first wrote words on the pages using a white crayon, placed post-it notes at various places, then swiped the paint over the pages. It took a minute for the paint to dry before I removed the post-its and used a baby wipe to remove the paint from the crayon areas. A pretty place to doodle and add images, like the packing tape stickers!

Now, you're done! You've got a great start on building some great journal pages.
___________________________________________________________________

Try making this next project and see if you don't get hooked on the magic!

Donna's blue floral dress sticker
To make the packing tape stickers:

MATERIALS
  • Magazines or books with pictures (images printed on thinner paper seemed to work best)
  • Bowl of water
  • Packing tape
  • Old credit/gift card
LET'S DO THIS
  • Find an image that you like in a magazine. Bold colors with lots of contrast look wonderful!
  • Carefully lay a strip of packing tape over the image, just past the edges of the picture. If the image is too large for one strip of tape, overlap a second strip slightly over the edge of the first strip.
  • Use the credit card to smooth out any air bubbles from the tape.
  • Place the taped image into the bowl of water and let it sit for a minute.
  • Gently rub the paper image from the back of the packing tape. The paper rolls off but the image remains on the tape. Magic!
  • Use glue to adhere these images on to your journal pages and envelopes. How about window clings!

Get busy and get creative!


Friday, October 14, 2016

Pour Your Art Out - New Classes Are About To Begin!

Start the fall and winter seasons off right by taking art classes taught by your favorite teacher - me!

Beginning Thursday, October 20th and Saturday, October 22nd, learn exciting new weekly projects in "Art Journaling" and "Exploring Crafts". (Thursday projects are repeated on Saturdays). The cost is $20 for each 2 hour class and will include some supplies.

For the first week's projects, here's the plan:

ART JOURNALING
(Thursdays, 5:30pm - 7:30pm; Saturdays, 9:00am - 11:00am)

We will be creating background images and colors using paints, credit cards, string, crayons, various papers, saran wrap, and packing tape transfers.
  • Bring your art journal (I use the 8 1/2" x 11" Ranger Dylusions Creative Journal, but bring whatever is your favorite)

EXPLORING CRAFTS

(Thursdays, 7:30pm - 9:30pm; Saturdays, 11:30am - 1:30pm)

With Halloween just around the corner, we will be making pumpkin vases and dioramas. Trust me - these are super cute!
  • Bring 2-3 carvable/hollow pumpkins, any size. (I found 6" pumpkins at the Dollar Store and larger ones at Joann's)

Future Art Journaling classes will include zentangles, magazine collage fantasies, adding color over black and white photos, using puzzle pieces, 3D image making, print making, and more.

In Exploring Crafts we'll make seasonal burlap banners, fall wreaths, music sheet angel wings, fabric painting, popsicle stick bracelets, mason jar art, canvas painting...let me stop right there!

All classes will be held in Concord - message me for details.
I'm looking forward to seeing you and getting our art on!

Monday, June 13, 2016

Selfie Journal Pages


Who doesn't make selfie pictures these days? I challenged my journal students to take the selfie craze to a new level by applying their head shots to magazine images. Tons of fun and giggles ensued when we found ourselves with new bodies whether human or animal or flowers. Or maybe the heads showed up in unusual locations like Nicole's face peeping out of a flower basket. 

Nicole in a basket
Print out some pictures of yourself, friends, and family, then thumb through some magazines for that perfect image. Crop your photo face close around the edges and glue it to the found image.

One student decided to draw a caricature of her face and designed a watercolor and washi tape portraiture. Super clever! 

Donna

This is a great project to do with the kids, to create fun greeting cards, or as a ladies art night adventure over cocktails! Where will your imagination take you? Want to be a giraffe? A sunflower? A mermaid or a rock? Now's your chance! It's a whole new you!


Monday, May 30, 2016

Fooling Around With Foam


My art journaling class keeps me on my toes! The students are super talented and inspirational so I try to find projects that will be fun to make and add value to their books. Not an easy feat as they are truly creative folks and I must think outside my comfort zone to challenge them. But, they keep showing up each week, smiling and eager to see what's "on the menu" for that night! 

Foam sheets can be found at dollar stores and craft shops. Typically you'll find kids using them to make picture frame art, masks, pencil toppers, magnetic letters, and the like. 

I had my students create foam stamps to embellish their journals. With just a few supplies, they went crazy making awesome designs.


Here's how we did it:

Supplies 
  • Foam sheets
  • Scissors
  • Stamp pads and/or acrylic paint
  • Pencil, small paint brush, or chopstick
  • Wine corks and glue (optional)
  • Hole punch (optional)
  • Cookie cutters (optional)

How to make this
  • Using the pencil, paint brush handle, chopstick or other dull edged tool, draw a design in the foam sheet. 
  • Press the design into the foam so that it leaves a deep impression without going all the way through the foam. These indentations will not print when ink or paint is applied to the stamps.
  • TIP: use cookie cutters to press a design into the foam.
  • Cut along the outside of the foam designs so they are a more manageable size to print with.
  • Use a hole punch to create a cool pattern in the foam, if desired.
  • Add color to your new designs using a stamp pad or lightly brush paint on to the surface.
  • Stamp the design on to your journal pages!
  • TIP: glue a wine cork or a bit of thick cardboard to the back of your foam stamp to keep your fingers from getting ink or paint all over them, although painted fingers are a sign of a serious artist!
  • The foam can be rinsed easily, ready for a new color.
 

TIP: carve letters backwards in the foam...oops!

The possibilities are endless. Grab some foam sheets, a few supplies, and let your imagination go wild!


Monday, May 23, 2016

Molding Paste Magic


I recently bought some molding paste after watching a couple of artist demonstrations. After playing with it on my own, I couldn't wait to spring it my art class students! We had a blast making bookmarkers and creating design-work in our journals. If you've used this medium before, stop laughing - sometimes I'm the last to catch on to cool products. If you've not used this stuff before, hold on to your hats - it's going to be a bumpy ride, literally!

Molding paste comes in a variety of "styles", from light to heavy to coarse. It creates a white or clay-tone finish that adds texture to artwork. It can be manuevered around while wet leaving peaks and shapes or it can be smoothed onto a surface for a bit of height and interest to a project. Once dried, it remains flexible without cracking and can be sanded, carved, and painted.

I bought the Golden brand of regular molding paste found at most craft stores and online. It has the consistancy of cake icing and is applied to a project with a palette knife, old credit card, or similar tool.

Here's what I did:


Materials

  • Molding paste
  • Cardstock or journal
  • Palette knife or old credit card
  • Acrylic paints
  • Stencils

How To Make This

  • Put a dollop of molding paste on a separate work surface, like a piece of paper or non-stick vinyl mat
 
  • Add a few drops of acrylic paint to the paste and stir it around to mix the two - instant colored paste!
  • Lay a stencil on the cardstock or journal page
  • Use the palette knife to smooth the paste over the top of the stencil. Using an old credit card to smooth the paste over the surface of the stencil is another handy trick

  • Carefully lift the stencil from the paper

  • Admire your work and move on to another page!

It takes about 15 minutes to dry depending on the thickness of the paste that you have applied.

TIP: while the paste is still wet, try making marks and impressions in it by using different tools like a fork, comb, or paper clip.
TIP: try smoothing a thicker layer of the paste on your page or card then gently pressing a rubber stamp onto the paste surface so that it will leave an interesting pattern.


You don't have to color it if you choose not to - it looks great in its original white form. In my journal, I applied the paste without color using large stencils, let them dry, then put the stencil back over the now slightly raised images, and colored them by spraying paint over one image and sponging rubber stamp ink over another. Very cool! 

You could try spraying ink or dabbing a rubber stamp pad onto your vinyl mat then swiping your dried white paste project through the ink for another colorizing affect.

Now I'm anxious to try it on canvas to create peaks and patterns. Stay tuned!

For more ideas on how to use the medium, here are some youtube links that may spark your creative powers...

marime's small art

one lucky day

nika in wonderland


Tuesday, April 26, 2016

This Just In...

Summer is calling and she wants you to answer her by getting outside and enjoying local events in your community! 

Here in Concord, the largest city in the Bay Area's Contra Costa County, we have so much goin' on!


The 28th annual Music and Market series begins Thursday evenings, May 19th through September 8th at Todos Santos Park. Free music, farm fresh food, friends - always fun!

Part of the same music series is the ever popular "Tuesday Night Blues", which begins on Wednesday (did I get ya?!) TUESDAY, July 5th through July 26th.

****************************************


Of course, I will be teaching my art journaling and craft classes throughout the summer and participating in a number of events including the Hope Walk, art shows, and the Contra Costa County Fair! See a list of my events and mark your calendar!

I hope to see you at one or more of these "happenings". Tell Summer hello!


Monday, March 21, 2016

Journal Pattern Play


A journal is an artists' playground! An opportunity to paint, doodle, write, layer papers, and explore new techniques. There is no limit - let your imagination take you on a journal journey!

On the pages above, I first laid down some basic squares and rectangles using watercolor paints. I kept my color choices to about 5 shades so it wouldn't be too crazy. But don't let that stop you from going with whatever moves you!

The paint dried rather quickly and I was able to move on to the really fun part - doodling. I used Sakura pigma micron pens with several tip sizes so that I could vary the design details. I love these waterproof, permanent pens but you may use any brand of permanent pens for your creation.

I played with different patterns within and around the squares and rectangles just to see what I could come up with. I liked what I made so much that I use the patterns as inspiration for design work on other pages.

Here are samples of what some of my art journaling students are working on...

Dawn Whitehead

Sandra Wolters

Sue Vanlandingham

Sandra Leonard


Aren't they a creative bunch! I am so thankful to inspire and be inspired by them.

I'd love to see what you are working on. Let's post your projects here!