Showing posts with label fun. Show all posts

Tuesday, November 21, 2017

Let's Make Something Together! Upcoming Holiday Craft Classes

The holidays are a perfect time to gather friends and family and get crafty! Handmade gifts are often the most cherished as nothing says love quite like 
"I made this just for you!".

I have a couple of upcoming classes that I will be teaching here in my hometown of Concord, California. Both are super fun to make with lovely results!

🎄🎄🎄🎄🎄🎄🎄🎄🎄🎄🎄🎄🎄🎄🎄🎄🎄🎄🎄🎄🎄🎄🎄🎄🎄🎄🎄

The first project will be on Friday, December 1st beginning at 6pm. We will create a charming Christmas tree made from buttons. We'll center the button tree on a picture frame for easy display - it'll be the center of attention during your holiday gatherings!


One of the cool things about this craft is that any holiday is open game for button art. In February, our class made beautiful framed button hearts. We loved the project so much that we're trying our hand at the Christmas tree design.


🎄🎄🎄🎄🎄🎄🎄🎄🎄🎄🎄🎄🎄🎄🎄🎄🎄🎄🎄🎄🎄🎄🎄🎄🎄🎄🎄

The second project will be on Saturday, December 2nd, beginning at 1pm. In this class, we'll make a gorgeous wreath using tulle fabric and embellishments. So many options here to make a unique door decor!

White tulle wreath - with removable poinsettia's - perfect for using at other occasions
Here are further class details:

WHERE:  Raquel Amaral Art Gallery – 1856 Colfax Street, 
                  Suite 6, Concord

COST:      $35 and includes all materials

PAYMENT DETAILS: advance payment is required to hold your place. Email me at kimlawson2000@gmail.com and I will send you a Paypal invoice.
                  
Let's make something together, make new friends, and start the holiday season with something beautiful made just by you!

See more of my artwork by clicking on the Etsy and Society6 tabs here. 


Wednesday, February 15, 2017

Hearts All Buttoned Up


Hearts and love. 

Who can live without these? One is necessary to keep our bodies alive and the other is our life's purpose. 

Wanting to pay homage to these attributes, especially with Valentine's day as a prompt, I had my craft class create projects just in time to celebrate the holiday and the sentiment.

I set out 8"x10" picture frames, various colored buttons, paper doilies, and strings of beads. My students chose colored paper to use as the background for their artwork which we inserted under the glass and closed the back of the frame in place. 

The students then got busy choosing the ornaments that they wanted to use. Using glue guns, they adhered the beads and buttons to the glass top. It was so fun to see the concentration and creative passion that these ladies used to make their works of art! Here are their results:

Nicole and Sophia show the love!

Nicole and Sophia's framed hearts

Rosa, Cindy, and Sarah with their "heartwork"
Detailed work of Cindy and Sarah's projects
I'm so proud of these ladies' projects! There's nothing like good friends gathering over a table covered with pretty baubles, their heads full of ideas, ending with a stronger bond and wonderful artwork.

To make my project, here's what I did:


I cut red cardstock paper to fit inside the frame using the glass as a template in order to cut the correct size. 


I dabbed a dot of gluestick on to a paper heart doily and placed it onto the center of the cardstock to use as a guide when I began laying down my button pattern. I closed the paper inside the frame and started picking out white and ivory colored buttons to use on my project. 

I cut off the shanks from the buttons that didn't have a flat back. After my glue gun was heated I got busy laying down the buttons on the glass top over the paper doily. It was like a puzzle trying to fill in the shape using the various sized buttons! Once the first layer was in place, I glued a second layer of buttons over the first in order to hide open spaces and to add more texture. 

After finishing the button heart creation, I decided that the project needed a little more pizazz. I removed the red cardstock from the inside of the frame, took the paper doily off of the cardstock and used a ruler and white ink pen to write rows of the word "love" down the entire page. I placed the cardstock back inside the frame and admired my finished handiwork. So cute!


Head on over to a dollar store or look through your stash of on-hand frames, gather your box of various buttons and beads, and see where love takes you!

Monday, January 23, 2017

Bottled Art


At a local craft store, I found a package of itsy bitsy glass bottles and couldn't resist buying them. I went wild thinking of how these little vessels could be filled with all sorts of treasures. 

In our recent craft class we had fun filling the bottles with beads, pearls, layers of glitter, sand, and bits of shiny confetti. Once filled, we glued the lids on tight then tied pretty ribbons around the tops so that they could be slipped over our heads and worn as necklaces. 

We also wrapped wire around some of the lids creating loops to attach chain for a more classy necklace look. Here's how to wrap the wire:

Materials

  • Wire
  • Round nosed pliers
  • Jump rings
  • Chain
  • Clasp (optional)


About 2 inches from the end of the wire, wrap the wire around the pliers to create a loop. Wind the short end of the wire around the loop a few times and cut off any excess. Place the loop on one side of the bottle and wind the long end of the wire around the bottle top a couple of times. Use the pliers to make the second loop on the other side of the bottle. Wrap the bottle top one more time to secure the second loop ending with a final wrap around the that loop to anchor it. Cut off the excess wire. 


Add jump rings onto the loops. Measure the chain for the length at which you want the necklace to hang. For a longer necklace, say 20 inches or more, you can simply attach the chain ends to the jump rings and slip the necklace over your head to wear it. For shorter jewelry, measure two pieces of chain equal in length, attach one end of each of the chains to the jump rings and the other end of the chains to a clasp. Instant style!


More ideas for your bottle craft: 

  • wrap wire with a few beads around the entire bottle
  • add a bit of sand in the bottle and place a small love note inside
  • fill the bottle with colored water and a few pearls or sand and shells
  • add charms to dangle from the wire loops
  • make a mini terrarium by adding a little sand and tiny plastic plants
  • dap glue to the top and sides of the lid and roll it in glitter (once dried, dab a bit more glue to the glitter to seal it)
  • put a small label on the outside of the bottle - "fairy dust", "love potion", "wishes", etc
  • fill with feathers, shells, or sea glass
  • glue a silk flower to the lid top

Of course, you don't have to wear the bottles as jewelry. These tiny art pieces look pretty lined up in a window, as decoration in a natural plant terrarium, or nestled in book where you've cut out a hole in the pages. 

Have fun with this craft - don't keep your ideas "bottled up"!


Monday, January 16, 2017

A Whole New Light On Lampshades


Some time ago, I bought a dozen small paper lampshades at a local reuse/recycle shop. So many ideas floated through my head as to how to decorate them! 

I knew this would be a perfect project for my art class students to toy with so I set out various items to spark the imagination and we got busy. With buttons, paints, ribbons, faux flowers, and more, we got to work. Time flies when you're having fun and in a couple of hours we celebrated our creativity!


We stationed the lampshades on tall wine glasses (sans wine!) and placed tealights and inside the glasses for a soft glow. How pretty these would be as table decorations at a wedding or other party. Sweet and simple with just the right amount of pizzazz!

I have a few bare lampshades left over and am anxious to hear how they tell me they would like to be "dressed". A favorite poem in a fancy script? A feathered shade? Paper punched designs? A beaded fringe? The possibilities are endless!

Tuesday, January 3, 2017

2017: A Creative Year Ahead with New Classes and Inspiration


According to the Chinese calendar, 2017 is the Year of the Rooster - the rooster being the sign of dawn and awakening, when triumph and success can be achieved through hard work and patience.

With the dawn of a new year comes new and wonder filled possibilities. I will be continuing to teach my art class series, introducing exciting projects for both art journalists and crafters.

Beginning Thursday, January 5th and Saturday, January 7th, learn weekly projects in "Art Journaling" and "Exploring Crafts". (Thursday projects are repeated on Saturdays). We'll create new projects each week, none that we've done in previous sessions!

The cost is $20 for each 2 hour class and may include some supplies.

Art Journaling classes on Thursdays run from 5:30pm - 7:30pm with projects repeated on Saturdays from 9:30am - 11:30am.

Exploring Crafts classes on Thursdays go from 7:30pm - 9:30pm with projects repeated on Saturdays from 11:30am - 1:30pm.

Future Art Journaling classes will include dream board designing, journal cover decorating, zentangles, magazine collage fantasies, adding color over black and white photos, using puzzle pieces, 3D image making, print making, and more.

Donna's Doodle

In Exploring Crafts we'll do 
canvas painting, 
jewelry making, fun with mason jars, fabric painting, mini book designing, garden art, light switch fabric covers, and other great projects!

Decorative bird house
All classes will be held at my in-home Concord studio - message me for location details and to be added to my weekly "create it" email list.

I'm looking forward to seeing you and getting our art on!

Monday, November 21, 2016

Line Dancing


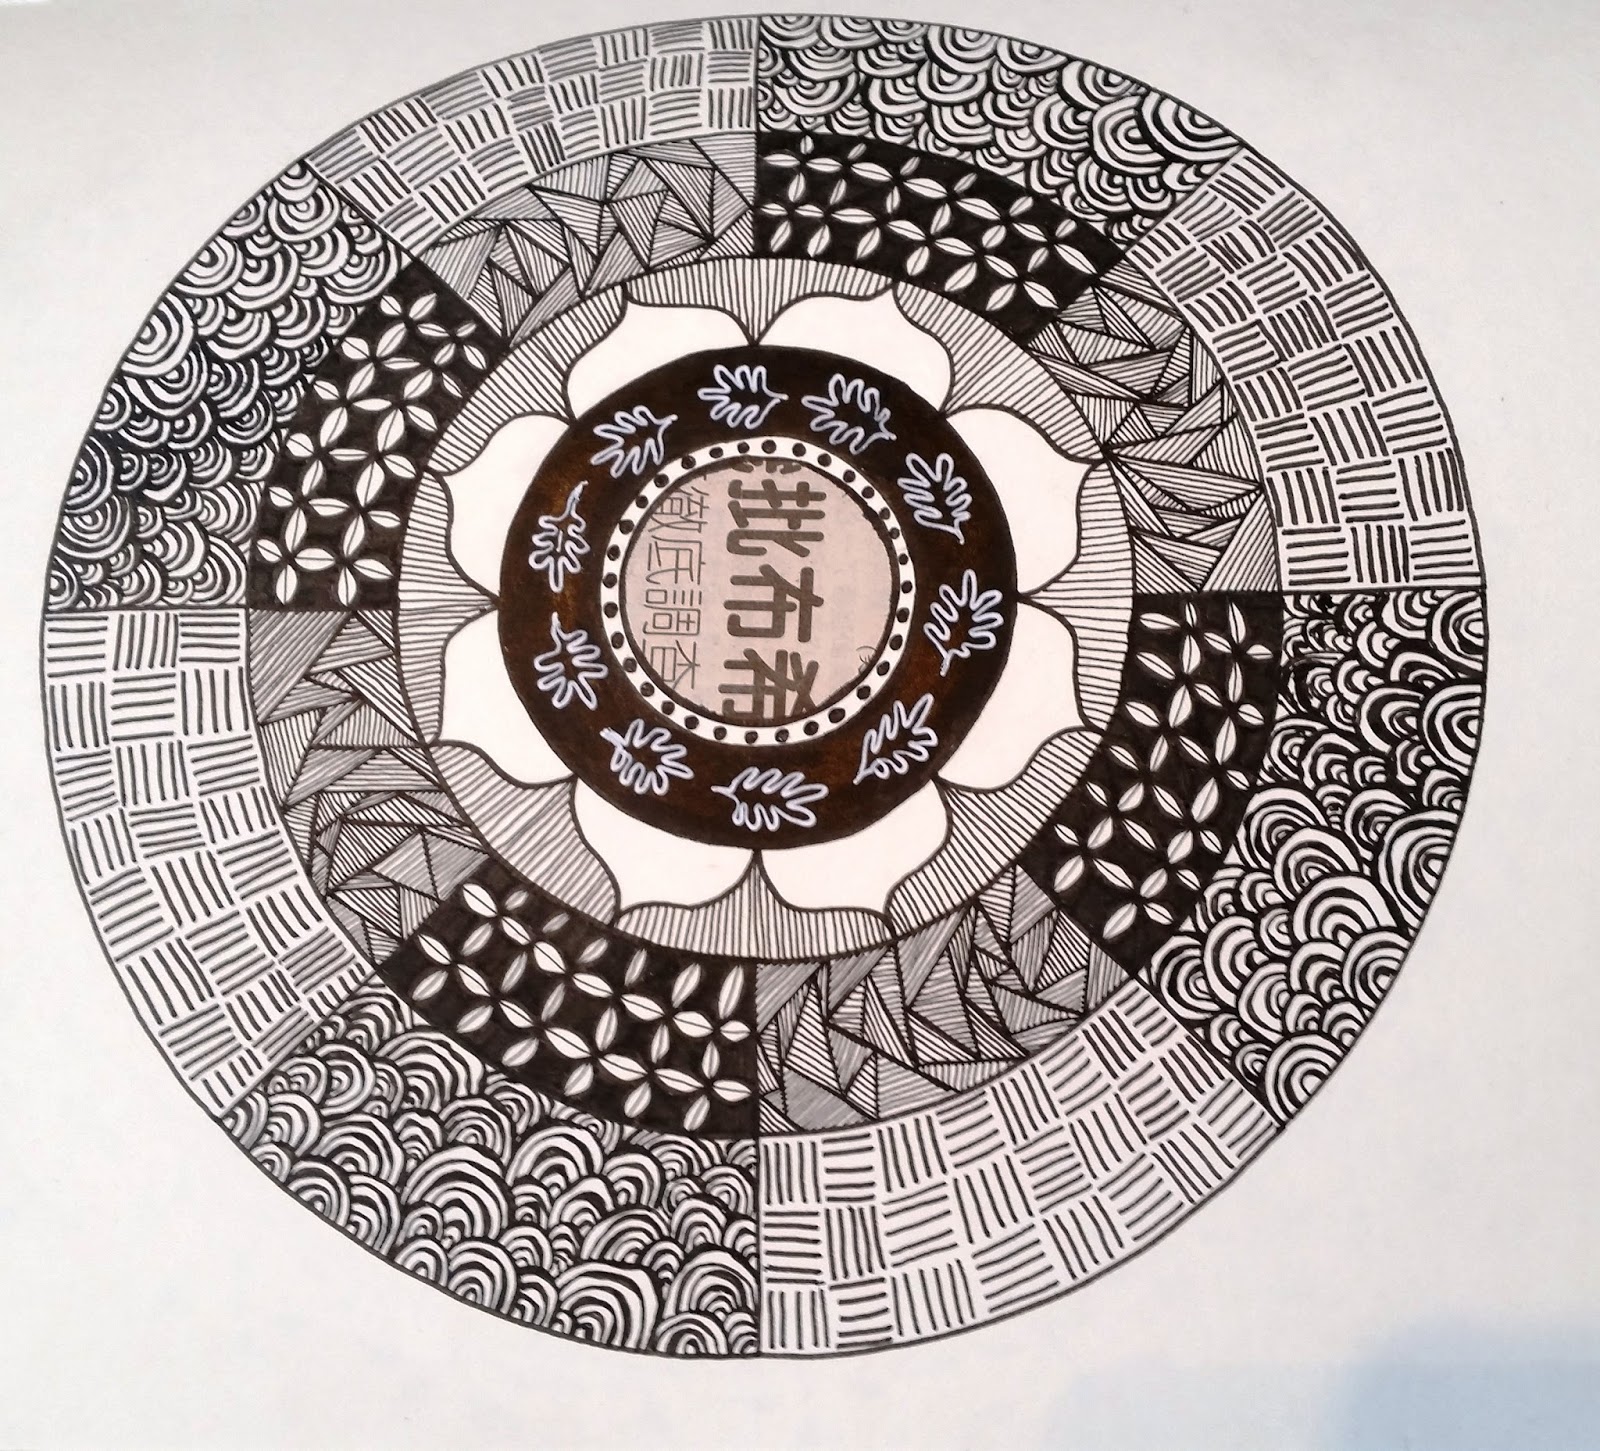
Staff meetings, waiting rooms, airplane rides, talking on the phone - all perfect opportunities to doodle and play with line drawing. I love pressing my brain to create fun patterns, using my journal as my playbook. 

Some may call this Zentangle but I don't conform to any particular rules, just allowing my mind to envision pattens and willing my hand to follow through. 


One of my students stared at the blank pages of her journal saying that she didn't know where to start. I told her not to think about it too hard - just put the pen to paper and begin drawing random shapes. Once you get going with nothing particular in mind, magic happens! These shapes are then sectioned out, filled in with staight lines, circles, zig-zags, and other patterns resulting in wonderful designwork.

Alicia's doodle page

I've created several pages of patterns that I reference when doing new work. It's addictive!


Pinterest or searching the internet for doodle patterns are excellent places to get ideas from. 

Having several sizes of pen tips is a plus. This allows you to make very detailed patterns and designs. I like using Pigma micron pens because of the variety of pen tips, they are permanent ink (which is great if you want to watercolor over your images), and they last a long time. Look for these qualities in the pens you use.


Here are more of my students' artwork - 

Donna goes wild!

Donna's creation

Sandra's lines

Marla's mandala


Open your journal, let loose your mind, and see what exciting art comes flowing out!

Monday, November 14, 2016

Falling For Wreaths


The seasons are changing - Mother Nature is beginning to show herself by way of fiery colors and crisp cold nights.

It's time to sit by a warm fire and get that glue gun out! Even if you don't have a fireplace to sit near, you can still create a fabulous fall wreath to adorn your front door, use as a table centerpiece, or present it to the host of a Thanksgiving party!

To make this wreath, here's what you will need:


Materials


  • Wreath frame - I used a 12 inch grapevine wreath but wreath frames made of  wire, straw, or styrofoam are fine to use, any size you like.
  • Various fall-colored faux leaves, flowers, berries, small foam pumpkin, gourds, etc.
  • Glue gun and glue sticks
  • Optional: decorative ribbon for hanging the wreath
  • Tip: I found many of these items at the local dollar store - nice quality and assortment without breaking the bank!

Let's Make This

Adding the details


  • If desired, glue or wrap a pretty ribbon to the back of the wreath for easy hanging
  • Use the glue gun to adhere leaves and flowers around the front and sides of the wreath frame so that the frame is hidden.
Lin's wreath in progress
  • Add the decorative pumpkins, gourds, and other items in several places around the wreath
  • Tip: Lin used a wire wreath and wrapped orange mesh ribbon around the frame before gluing on flowers (both from a dollar store!). This gave it a nice colored background to start with and ease in gluing items to a solid backing.


There you have it! A lovely showpiece that will last for years and you can say "I made it myself!"

Monday, October 31, 2016

Journaling Pages - Using Paint, Pictures, and Credit Cards As Tools

My in-home classes are taking off with a bang and a glue gun! We're having so much fun making new artwork while gabbing and giggling, with maybe a glass of wine to promote extra creative powers!

Our first journaling class projects included making background pages with paints and credit cards. We also got hooked on making stickers using packing tape and magazines. Sooo much fun making those!

To get started making some backgrounds for your journal, follow these steps:

MATERIALS
  • Blank journal or other book
  • Acrylic paints
  • Old credit/gift card
  • Baby wipes or paper towels

HOW TO MAKE THIS
Super simple but it looks really cool!
  • Squirt a few drops of acrylic paint anywhere on the page
  • Drag the credit card across the paint and the book pages - straight line, zig-zag, curvy - have fun with the process.


  • Between colors, wipe any excess paint off of the card with a paper towel or baby wipe. Be sure to smoosh all the paint off the card on to your pages before wiping (never waste good paint, right?)
Donna adding colors to her pages
Alicia's making waves of blue

  • Drop another color on to the page and repeat the swiping over the pages. Do this with as many colors as you like, even criss-crossing colors over each other. In the image below, I first wrote words on the pages using a white crayon, placed post-it notes at various places, then swiped the paint over the pages. It took a minute for the paint to dry before I removed the post-its and used a baby wipe to remove the paint from the crayon areas. A pretty place to doodle and add images, like the packing tape stickers!

Now, you're done! You've got a great start on building some great journal pages.
___________________________________________________________________

Try making this next project and see if you don't get hooked on the magic!

Donna's blue floral dress sticker
To make the packing tape stickers:

MATERIALS
  • Magazines or books with pictures (images printed on thinner paper seemed to work best)
  • Bowl of water
  • Packing tape
  • Old credit/gift card
LET'S DO THIS
  • Find an image that you like in a magazine. Bold colors with lots of contrast look wonderful!
  • Carefully lay a strip of packing tape over the image, just past the edges of the picture. If the image is too large for one strip of tape, overlap a second strip slightly over the edge of the first strip.
  • Use the credit card to smooth out any air bubbles from the tape.
  • Place the taped image into the bowl of water and let it sit for a minute.
  • Gently rub the paper image from the back of the packing tape. The paper rolls off but the image remains on the tape. Magic!
  • Use glue to adhere these images on to your journal pages and envelopes. How about window clings!

Get busy and get creative!


Monday, October 24, 2016

Boo-tiful Crafts to Make


With Halloween just a week away, pumpkin carving projects came to my mind as a perfect treat to make for celebrating this holiday. 

I challenged my art students to come up with their own twist on creating jack-o-lanterns. As usual, they met the summons with gusto and, before long, we had a table filled with beautiful achievements!

Alicia was very excited about this project - or perhaps it was the wine and tangerine margarita's working?!

Here's how we made decorative vases

SUPPLIES
  • Hollow, styrofoam pumpkin (I found a 6 inch size at a dollar store)
  • Serrated knife
  • Various fall-colored artificial flowers and Halloween related items
  • Hot glue gun (optional)
HOW TO MAKE IT
  • Carefully make a circle cut at the top of the pumpkin using the knife, at least big enough to put your hand inside (shown at the right is the cut-out I made on the side of a pumpkin to prepare it for a diorama)
Option 1:
  • Place artificial floral stems inside the pumpkin allowing the blooms and greenery to pop from the top 
Rosa's Fall Floral Vase - with a touch of bones

Option 2:
  • Hot glue objects to the pumpkin so that they're peeking out of the top (I rummaged through my stash of Halloween decorations and put them out for the group to find clever ways to reuse them - styrofoam skulls and bones, plastic witches and spiders, leaves, etc.) 

    Carol's Witchy Vase
Option 3:
  • Place a glass cup inside the pumpkin, tall enough to reach the rim, and fill with potting soil and a succulent or other live plant.
The floral vases make pretty tabletop displays or hostess gifts, perfect for this holiday and through the Thanksgiving season.


To make a diorama:

SUPPLIES
  • Hollow, styrofoam pumpkin, any size
  • Serrated knife
  • Various fall-colored artificial flowers, moss, vegetable netting, and Halloween related items
  • Hot glue gun
  • Battery operated tea lights (optional)
HOW TO MAKE IT
  • Carefully make an oval cut at the side of the pumpkin using the knife
  • Fill the pumpkin with whatever suits your fancy! 
  • We hot glued moss, florals, and spooky objects inside and outside the pumpkins. I cut up a bit of netting from a vegetable bag and hot glued that to the inside back of a pumpkin and then glued a spider to the "web". In another pumpkin, I placed a plastic skull from a dollar store that I painted in a sugar skull fashion on top of a bed of moss. I put a battery operated tea light on either side of the skull so that they would flicker inside the pumpkin and show off the skull. As you can see from the picture at the top of this page, it turned out quite booo-tiful!
Sandy's Floral Diorama with Skeleton Pair
Carol's Fright Night Scene


Alicia and Nicole's Spooky Creations


Don't be afraid to create your own frighteningly beautiful art!